
Phillips and Pozidriv look almost identical, but they’re built for different jobs. Phillips uses a simple tapered cross designed to cam out under high torque. Pozidriv adds four secondary ribs that grip harder and resist cam-out. The rule that saves you a stripped screw every time: always match the bit to the head, PH for Phillips, PZ for Pozidriv, because forcing one into the other chews up the recess.
TL;DR:
- The most reliable way to distinguish Pozidriv from Phillips screws is by the four diagonal hash marks between the cross arms, not tip shape or stamping.
- Pozidriv provides greater torque resistance and less cam-out thanks to its eight radial contact points, making it ideal for high-torque applications like furniture assembly.
- Using the wrong bit, such as forcing a Phillips bit into a Pozidriv screw, risks damaging the recess and stripping the head, especially under high torque.
- Most common screw sizes for household work are PH2 and PZ2, with the latter offering more grip and less cam-out when used with the correct bit.
- A field-ready kit should include matching sizes for both systems, with proper organization and quality bits to avoid stripping and save time on every job.
Table of Contents
- Phillips vs Pozidriv: How to Tell Them Apart Fast
- Why the Shapes Behave So Differently Under Torque
- Choosing the Right Bit Size and Avoiding a Stripped Head
- Your Field Checklist for PH and PZ Work
- Why Your Bit Kit Quality Actually Matters Here
- What Actually Matters Once You Know the Difference
- Build a Kit That Never Leaves You Guessing
- Sources
- FAQ
Phillips vs Pozidriv: How to Tell Them Apart Fast
You don’t need a magnifying glass to sort these out on the job. The two heads share a cross shape, but the details give them away in about two seconds once you know where to look.
- Check for the tick marks. Pozidriv screws have four small ribs, or hash marks, positioned diagonally between the main cross arms. Phillips heads are clean, with nothing but the plain cross.
- Feel the bit tip. A Phillips bit tapers to a sharper point. A Pozidriv bit has a blunter, more squared-off tip built to match those extra ribs.
- Read the stamp. Bits and screws are usually marked. Look for “PH” followed by a number for Phillips, or “PZ” followed by a number for Pozidriv.
- Run the drop test. Set the bit into the recess without pressing down. A matching bit sits flush and doesn’t wiggle. A mismatched bit rocks slightly or sits high, and that’s your warning sign before you even pull the trigger.
The hash marks between the cross arms are the single most reliable field clue, more dependable than trying to judge tip shape by eye in bad light or a cramped cabinet.
Pro Tip: Keep a scrap Pozidriv screw taped inside your toolbox lid. When you’re not sure what you’re looking at on a job, hold the unknown screw next to it. Side-by-side comparison beats guessing every time.
Why the Shapes Behave So Differently Under Torque
The geometry isn’t cosmetic. Phillips has four tapered flutes that meet at a point, which was intentional. Phillips was designed to cam out once torque hit a certain threshold, so power tools on early assembly lines wouldn’t overtighten and snap fasteners. That made sense in the 1930s. It’s less useful now that most of us are running cordless drivers with adjustable clutches instead of unregulated line tools.
Pozidriv solves the same problem differently. It swaps the tapered flutes for parallel flanks and adds those four secondary ribs, creating eight radial contact points instead of Phillips’ four. More contact area means the bit grips more of the recess wall, which spreads out torque instead of concentrating it at four small points.
That’s why:
- Pozidriv resists cam-out even at higher torque settings, making it the choice where repeatable engagement matters more than easy release, like assembly-line and flat-pack furniture work.
- Phillips still cams out on purpose, which is handy when you want a clutch to slip rather than strip a small screw, but frustrating when you’re driving something that needs real clamping force.
- A cordless driver’s clutch setting interacts directly with this geometry. Crank the torque too high on a Phillips screw and you’ll cam out before you’re fully seated, no matter how sharp the bit is.
Choosing the Right Bit Size and Avoiding a Stripped Head
Bit selection isn’t complicated once you know the size families. Phillips runs PH0 through PH3 for most consumer and trade work, occasionally up to PH4 on heavier fasteners. Pozidriv mirrors that with PZ0 through PZ3. In practice, PH2 and PZ2 cover the majority of screws you’ll run into around a house or job site, from cabinet hinges to electrical boxes.
Here’s the fit check worth building into muscle memory:
- Hand-start the screw a turn or two before power tools touch it, so you can feel whether the bit is seating cleanly.
- Drop the bit into the recess and confirm it sits flush with no visible gap.
- Check for rock. Wiggle the driver slightly. Zero movement means a correct match; any play means you’ve got the wrong drive type.
- Apply light torque first, watching for the bit lifting or slipping before you commit to full driving speed.
- Set your clutch one or two notches below what you’d use on a lag bolt when working with smaller PH2 or PZ2 screws, since these strip fast under excess torque.
Mixing systems is the fastest way to ruin a screw. A Pozidriv bit forced into a Phillips head won’t seat correctly and can chew up the recess in seconds, while a Phillips bit dropped into a Pozidriv screw fits loosely enough to slip and cam out almost immediately.
If you’ve already stripped a head, don’t keep forcing it. A screw extractor, locking pliers, or careful drilling will get it out, but every one of those methods costs you more time than grabbing the right bit would have in the first place.
Pro Tip: If a screw starts to strip, stop immediately and switch to a slightly larger bit size before trying again. Continuing with the same bit almost always finishes the job of ruining the head.
Your Field Checklist for PH and PZ Work
A kit that covers both systems removes the guesswork before you’re even on the ladder. Build it once and you stop losing minutes to stripped screws on every job.
- Carry PH0 through PH3 and PZ0 through PZ3 as your baseline. That range handles nearly everything you’ll touch on a residential or light commercial job.
- Use a magnetized bit holder so you can swap between PH and PZ without digging through a pouch.
- Pick a driver with an adjustable clutch, not a fixed-speed drill, for anything smaller than a lag bolt.
- Color-code or label your PH and PZ bits separately. Under a work light, they’re harder to tell apart than you’d think.
- Follow the same sequence every time: identify the head, hand-start the screw, confirm seating, then commit to full torque.
Small habits like these are what separate a job that goes smoothly from one where you’re pulling out a broken bit at 4:45 on a Friday. For a deeper look at sizing across both systems, the guide to Phillips head screwdriver sizes covers the full range in more detail.
Why Your Bit Kit Quality Actually Matters Here
A cheap bit that’s slightly out of spec makes every one of the checks above harder to trust. Well-made bits and drivers built to ISO and DIN standards maintain consistent tolerances across the whole line, not just on the bits you happened to get lucky with.
That consistency backs a lifetime warranty, helping ensure that a damaged or missing bit doesn’t stall a job for a week.
For readers building out a kit that covers both drive types without digging through loose bits in a drawer, a few options fit naturally:
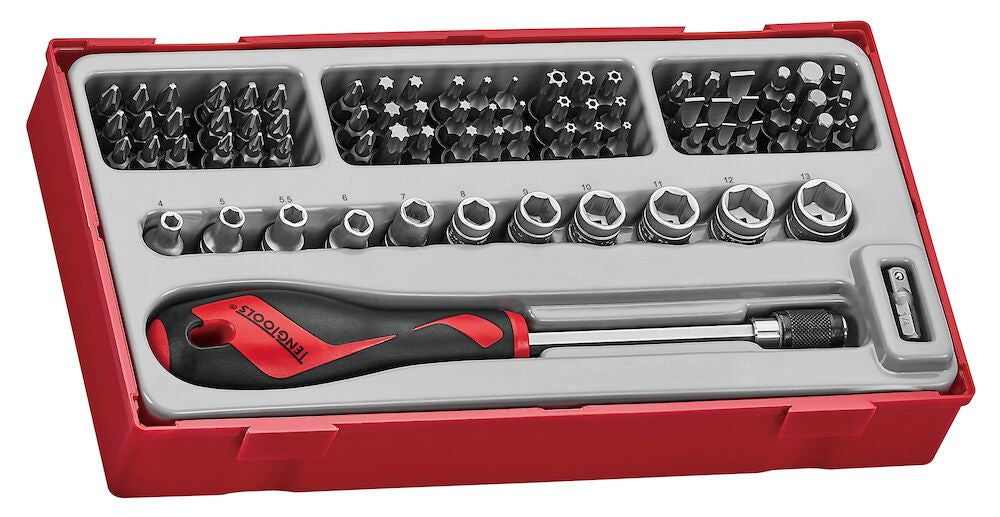
- The Teng Tools General Tool Set FOAM4X4 18 Pieces gives you a compact starter set with foam organization built in.
- The Teng Tools Mobile Tool Panel Tool Kit 33 Pieces works well for a wall-mounted PH/PZ station in a shop.
- The Teng Tools General Tool Set FOAM6X6 99 Pieces suits tradespeople who want broader drive-type coverage in one case.
| Kit | Best for | Storage style |
|---|---|---|
| TTEX18N (18 pieces) | Starter DIY kit | Foam4x4 tray |
| TPT01 (33 pieces) | Wall-mounted shop station | Mobile tool panel |
| TELX99 (99 pieces) | Broad trade coverage | Foam6x6 tray |
Setting up a small tray with a labeled PH section and a labeled PZ section takes about ten minutes and pays for itself the first time you reach for the right bit without thinking.
What Actually Matters Once You Know the Difference
The internet oversells how complicated this really is. Once you can spot the ribs and run a two-second drop test, you’ve solved 90 percent of the confusion between these two drives. Where most DIY advice falls short is treating identification as the finish line. Knowing PZ has ribs and PH doesn’t is trivia if you’re still cranking a fixed-torque drill on a small screw with no clutch discipline.
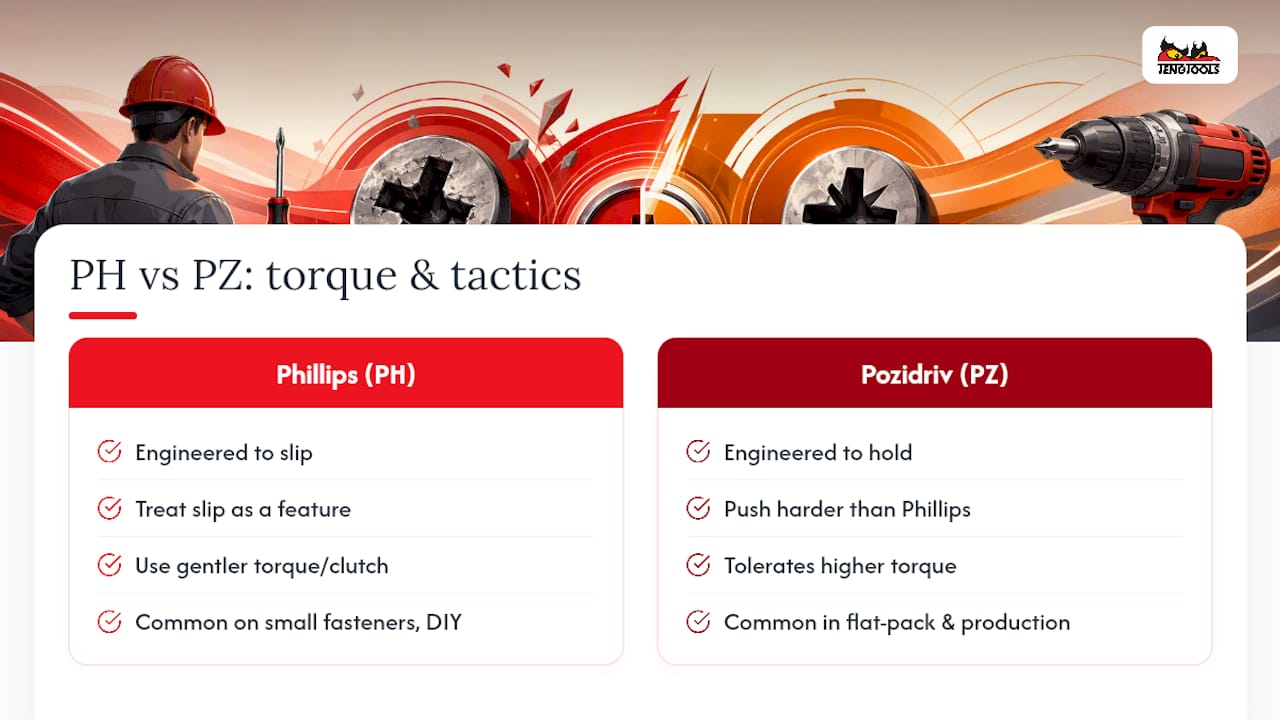
The bigger lesson buried in the mechanical differences is about torque behavior, not appearance. Phillips was engineered to slip on purpose. Treat that as a feature, not a defect, and you’ll stop fighting your driver on small fasteners. Pozidriv was engineered to hold. Push it harder than you’d push Phillips and it’ll usually take it, which is exactly why it shows up more often in flat-pack furniture and production work.
If you take one thing from this, prioritize the fit check over memorizing size charts. A driver that sits flush and doesn’t rock will tell you more in two seconds than any amount of squinting at rib patterns.
— David
Build a Kit That Never Leaves You Guessing
A loose handful of mismatched bits in a drawer is how stripped screws happen in the first place. Teng Tools USA’s Get Organized™ trays give every PH and PZ bit a dedicated slot, so you can see at a glance what’s missing before you’re halfway up a ladder without it.
The Teng Tools General Tool Set FOAM4X4 18 Pieces is a practical starting point for anyone building a PH/PZ kit from scratch, backed by a lifetime warranty and shipped same-day from Teng Tools USA’s Texas warehouse. Browse the full range at the Teng Tools USA site and pick the storage format, foam tray, mobile panel, or full cabinet, that matches how much ground you cover on a given week.
Sources
- What is the difference between Phillips and Pozi screw heads? | Essentra Components US
- Stop stripping screws by using the right bits | MakeUseOf
- What are Pozidriv screws? | Design World
- What’s the Difference: Phillips vs. Pozidriv Bits - Fine Homebuilding
FAQ
Can You Use a Phillips Bit on a Pozidriv Screw?
You can force it in, but it won’t seat correctly, and it commonly leads to cam-out and a stripped recess rather than a clean drive. Always switch to a PZ bit once you spot the secondary ribs.
Are Phillips and Pozidriv the Same?
No. Phillips has four tapered flutes and four contact points, while Pozidriv adds four secondary ribs for eight radial contact points and uses parallel flanks instead of a taper.
Why Doesn’t the US Use Robertson Screws More Often?
Robertson’s square drive never gained the same manufacturing foothold in the United States that Phillips did, so American DIY and trade work still defaults heavily to PH2 as the standard, even though Robertson resists cam-out well.
Is Pozidriv Better Than Phillips?
Pozidriv handles higher torque with less cam-out, which is why it’s common in European manufacturing and flat-pack furniture. Phillips still has its place wherever a driver slipping under load is a safety feature rather than a flaw.
What’s the Fastest Way to Tell Them Apart on the Job?
Look for the small hash marks between the cross arms. If they’re there, it’s Pozidriv, and a quick drop-fit test confirms the bit before you commit to driving it.